
Linking MS Power BI Desktop to Microsoft Fabric Lakehouse using SQL connection string


Introduction
In today's data-driven world, Microsoft Power BI Desktop and MS Fabric have become essential tools for businesses seeking to gain valuable insights from their data. Power BI Desktop is a powerful data visualization tool that allows users to create interactive reports and dashboards, while MS Fabric is a cloud-based platform that provides data storage and processing capabilities.
In this blog post, we will guide you through the process of connecting Power BI Desktop to MS Fabric using a connection string. This will enable you to unlock the potential of your data and gain insights that can drive your business forward.
Establishing a Connection to a Lakehouse using SQL Connection String
Step 1: Install Power BI Desktop
If you haven't already, you'll need to install Power BI Desktop on your machine. It’s available for free from the Microsoft Store or the Power BI website. Follow the installation instructions, and once installed, launch the application.
Step 2: Obtain the Connection String
To connect to Microsoft Fabric, you will need a connection string. This is a snippet of text that tells Power BI how to find your Fabric instance and how to authenticate against it. Open Microsoft Fabric, choose your workspace on which you have a created Lakehouse. On the created Lakehouse, on the type of SQL Analytics endpoint, click on the three dots.

You will have a contextual menu. Choose “Copy SQL connection string”.

Confirm the copy of the SQL connection string.

The SQL connection string will be copied into the clipboard.

Step 3: Open Power BI Desktop and Get Data
With Power BI Desktop open, go to the "Home" tab and click on "Get Data". You'll be presented with a list of data sources you can connect to. Select "SQL Server" as your data source. Choose the “SQL Server” connector.

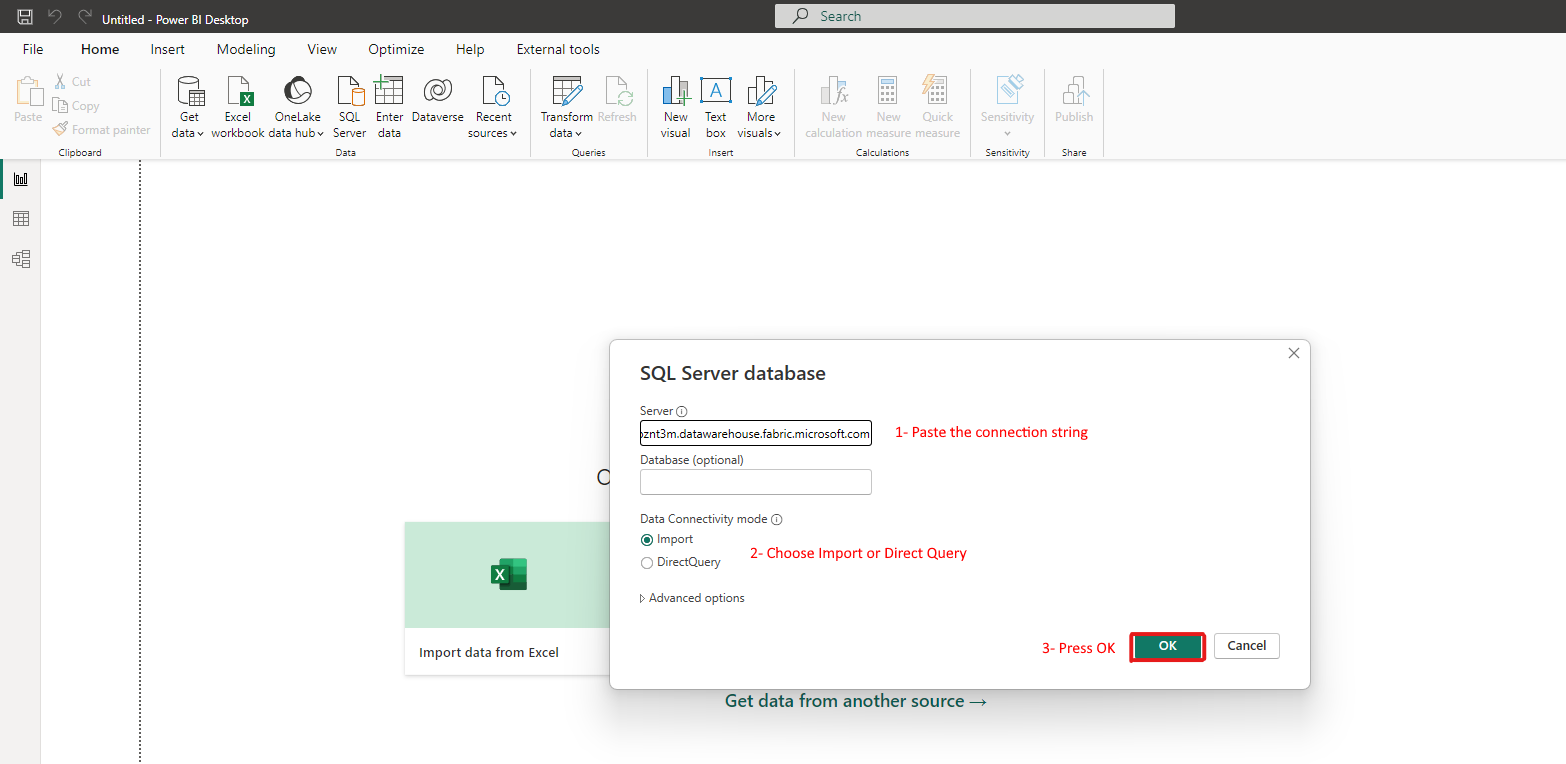
Step 4: Enter the Connection String
In the SQL Server database dialog box, paste your connection string into the "Server" field. If your Fabric instance uses a specific database, enter the name of the database in the "Database" field. Otherwise, you can leave it blank. Choose the type of connection either “Import” or “Direct Query” and then press “Ok”.
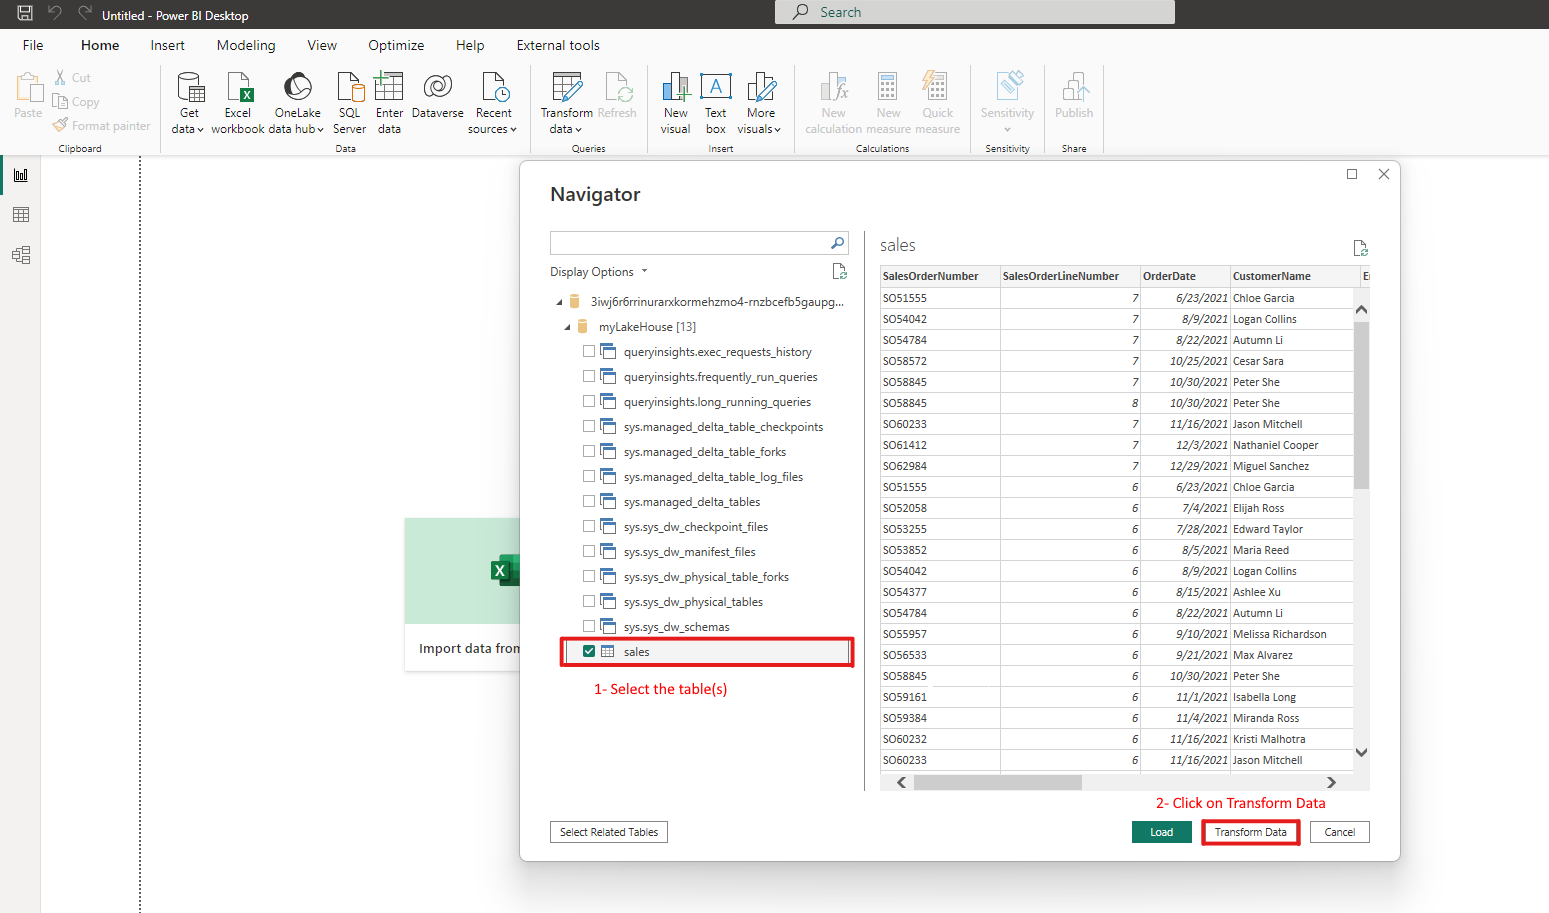
Step 5: Explore Your Data
After connecting, Power BI will display a navigator pane where you can select the tables or views you want to include in your report.

Select the Lakehouse expand to choose the relevant Tables and click on Transform Data.
Power BI will then open Power Query Editor for transforming the data.

Step 5: Advanced Editor
On the Home Tab, click on the Advanced Editor to view the details on the SQL connection string.

Step 6: Visualize and Share
With your data imported, use Power BI Desktop's rich set of tools to create reports and visualizations. Once you're satisfied with your creation, you can publish your reports to the Power BI service and share them with others in your organization.
Conclusion
Connecting Power BI Desktop to Microsoft Fabric using a connection string is a straightforward process that can open up a world of data exploration and visualization opportunities. By following these steps, you can quickly and easily integrate your Fabric data with Power BI, enabling you to create powerful and actionable business intelligence reports.
Unlock the full potential of your data with Power BI and Microsoft Fabric and transform the way you make business decisions today!